
Convolutional neural networks are now capable of outperforming humans on some computer vision tasks, such as classifying images. That is, given a photograph of an object, answer the question as to which of 1,000 specific objects the photograph shows. A competition-winning model for this task is the VGG model by researchers at Oxford. What is important about this model, besides its capability of classifying objects in photographs, is that the model weights are freely available and can be loaded and used in your own models and applications.
In this tutorial, you will discover the VGG convolutional neural network models for image classification.
After completing this tutorial, you will know:
- About the ImageNet dataset and competition and the VGG winning models.
- How to load the VGG model in Keras and summarize its structure.
- How to use the loaded VGG model to classifying objects in ad hoc photographs.
Let’s get started.
This tutorial is divided into 4 parts; they are:
- ImageNet
- The Oxford VGG Models
- Load the VGG Model in Keras
- Develop a Simple Photo Classifier
ImageNet
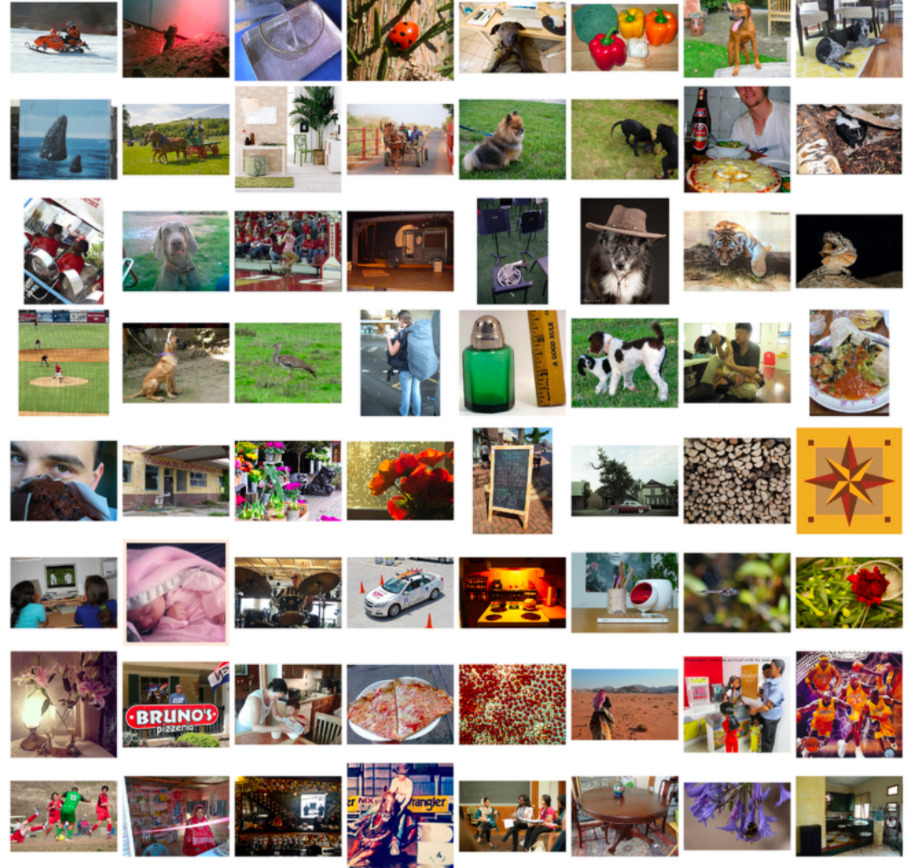
ImageNet is a research project to develop a large database of images with annotations, e.g. images and their descriptions. The images and their annotations have been the basis for an image classification challenge called the ImageNet Large Scale Visual Recognition Challenge or ILSVRC since 2010. The result is that research organizations battle it out on pre-defined datasets to see who has the best model for classifying the objects in images.
The ImageNet Large Scale Visual Recognition Challenge is a benchmark in object category classification and detection on hundreds of object categories and millions of images. The challenge has been run annually from 2010 to present, attracting participation from more than fifty institutions.
— ImageNet Large Scale Visual Recognition Challenge, 2015.
For the classification task, images must be classified into one of 1,000 different categories.
For the last few years very deep convolutional neural network models have been used to win these challenges and results on the tasks have exceeded human performance.
The Oxford VGG Models
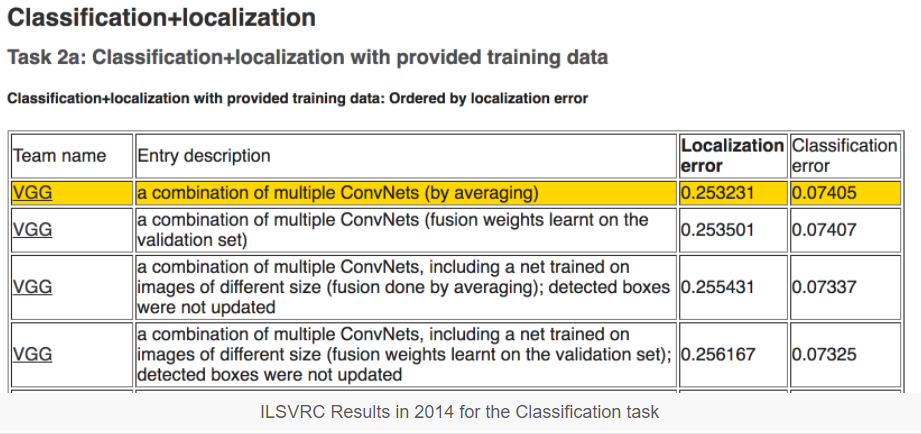
Researchers from the Oxford Visual Geometry Group, or VGG for short, participate in the ILSVRC challenge. In 2014, convolutional neural network models (CNN) developed by the VGG won the image classification tasks.
After the competition, the participants wrote up their findings in the paper:
They also made their models and learned weights available online. This allowed other researchers and developers to use a state-of-the-art image classification model in their own work and programs. This helped to fuel a rash of transfer learning work where pre-trained models are used with minor modification on wholly new predictive modelling tasks, harnessing the state-of-the-art feature extraction capabilities of proven models.
… we come up with significantly more accurate ConvNet architectures, which not only achieve the state-of-the-art accuracy on ILSVRC classification and localisation tasks, but are also applicable to other image recognition datasets, where they achieve excellent performance even when used as a part of a relatively simple pipelines (e.g. deep features classified by a linear SVM without fine-tuning). We have released our two best-performing models to facilitate further research.
— Very Deep Convolutional Networks for Large-Scale Image Recognition, 2014.
VGG released two different CNN models, specifically a 16-layer model and a 19-layer model.
Refer to the paper for the full details of these models.
The VGG models are no longer state-of-the-art by only a few percentage points. Nevertheless, they are very powerful models and useful both as image classifiers and as the basis for new models that use image inputs.
In the next section, we will see how we can use the VGG model directly in Keras.
Load the VGG Model in Keras
The VGG model can be loaded and used in the Keras deep learning library. Keras provides an Applications interface for loading and using pre-trained models. Using this interface, you can create a VGG model using the pre-trained weights provided by the Oxford group and use it as a starting point in your own model, or use it as a model directly for classifying images.
In this tutorial, we will focus on the use case of classifying new images using the VGG model. Keras provides both the 16-layer and 19-layer version via the VGG16 and VGG19 classes. Let’s focus on the VGG16 model.
The model can be created as follows:
from keras.applications.vgg16 import VGG16
model = VGG16()
That’s it.
The first time you run this example, Keras will download the weight files from the Internet and store them in the ~/.keras/models directory.
Note that the weights are about 528 megabytes, so the download may take a few minutes depending on the speed of your Internet connection.
The weights are only downloaded once. The next time you run the example, the weights are loaded locally and the model should be ready to use in seconds. We can use the standard Keras tools for inspecting the model structure.
The VGG() class takes a few arguments that may only interest you if you are looking to use the model in your own project, e.g. for transfer learning.
For example:
- include_top (True): Whether or not to include the output layers for the model. You don’t need these if you are fitting the model on your own problem.
- weights (‘imagenet‘): What weights to load. You can specify None to not load pre-trained weights if you are interested in training the model yourself from scratch.
- input_tensor (None): A new input layer if you intend to fit the model on new data of a different size.
- input_shape (None): The size of images that the model is expected to take if you change the input layer.
- pooling (None): The type of pooling to use when you are training a new set of output layers.
- classes (1000): The number of classes (e.g. size of output vector) for the model.
Next, let’s look at using the loaded VGG model to classify ad hoc photographs.
Develop a Simple Photo Classifier
Let’s develop a simple image classification script.
1. Get a Sample Image
First, we need an image we can classify. You can download a random photograph of a coffee mug from Flickr.

Download the image and save it to your current working directory with the filename ‘mug.jpg‘.
2. Load the VGG Model
Load the weights for the VGG-16 model, as we did in the previous section.
from keras.applications.vgg16 import VGG16
model = VGG16()
3. Load and Prepare Image
Next, we can load the image as pixel data and prepare it to be presented to the network. Keras provides some tools to help with this step.
First, we can use the load_img() function to load the image and resize it to the required size of 224×224 pixels.
from keras.preprocessing.image import load_img
# load an image from file
image = load_img('mug.jpg', target_size=(224, 224))
Next, we can convert the pixels to a NumPy array so that we can work with it in Keras. We can use the img_to_array() function for this.
from keras.preprocessing.image import img_to_array
# convert the image pixels to a numpy array
image = img_to_array(image)
The network expects one or more images as input; that means the input array will need to be 4-dimensional: samples, rows, columns, and channels.
We only have one sample (one image). We can reshape the array by calling reshape() and adding the extra dimension.
# reshape data for the model
image = image.reshape((1, image.shape[0], image.shape[1], image.shape[2]))
Next, the image pixels need to be prepared in the same way as the ImageNet training data was prepared. Specifically, from the paper:
The only preprocessing we do is subtracting the mean RGB value, computed on the training set, from each pixel.
— Very Deep Convolutional Networks for Large-Scale Image Recognition, 2014.
Keras provides a function called preprocess_input() to prepare new input for the network.
from keras.applications.vgg16 import preprocess_input
# prepare the image for the VGG model
image = preprocess_input(image)
We are now ready to make a prediction for our loaded and prepared image.
4. Make a Prediction
We can call the predict() function on the model in order to get a prediction of the probability of the image belonging to each of the 1000 known object types.
# predict the probability across all output classes
yhat = model.predict(image)
Nearly there, now we need to interpret the probabilities.
5. Interpret Prediction
Keras provides a function to interpret the probabilities called decode_predictions().
It can return a list of classes and their probabilities in case you would like to present the top 3 objects that may be in the photo.
We will just report the first most likely object.
from keras.applications.vgg16 import decode_predictions
# convert the probabilities to class labels
label = decode_predictions(yhat)
# retrieve the most likely result, e.g. highest probability
label = label[0][0]
# print the classification
print('%s (%.2f%%)' % (label[1], label[2]*100))
And that’s it.
Complete Example
Tying all of this together, the complete example is listed below:
from keras.preprocessing.image import load_img
from keras.preprocessing.image import img_to_array
from keras.applications.vgg16 import preprocess_input
from keras.applications.vgg16 import decode_predictions
from keras.applications.vgg16 import VGG16
# load the model
model = VGG16()
# load an image from file
image = load_img('mug.jpg', target_size=(224, 224))
# convert the image pixels to a numpy array
image = img_to_array(image)
# reshape data for the model
image = image.reshape((1, image.shape[0], image.shape[1], image.shape[2]))
# prepare the image for the VGG model
image = preprocess_input(image)
# predict the probability across all output classes
yhat = model.predict(image)
# convert the probabilities to class labels
label = decode_predictions(yhat)
# retrieve the most likely result, e.g. highest probability
label = label[0][0]
# print the classification
print('%s (%.2f%%)' % (label[1], label[2]*100))
Running the example, we can see that the image is correctly classified as a “coffee mug” with a 81% likelihood.
coffee_mug (80.61%)
Extensions
This section lists some ideas for extending the tutorial that you may wish to explore.
- Create a Function. Update the example and add a function that given an image filename and the loaded model will return the classification result.
- Command Line Tool. Update the example so that given an image filename on the command line, the program will report the classification for the image.
- Report Multiple Classes. Update the example to report the top 5 most likely classes for a given image and their probabilities.
Further Reading
This section provides more resources on the topic if you are looking go deeper.
- ImageNet
- ImageNet on Wikipedia
- Very Deep Convolutional Networks for Large-Scale Image Recognition, 2015.
- Very Deep Convolutional Networks for Large-Scale Visual Recognition, at Oxford.
- Building powerful image classification models using very little data, 2016.
- Keras Applications API
- Keras weight files files
Summary
In this tutorial, you discovered the VGG convolutional neural network models for image classification.
Specifically, you learned:
- About the ImageNet dataset and competition and the VGG winning models.
- How to load the VGG model in Keras and summarize its structure.
- How to use the loaded VGG model to classifying objects in ad hoc photographs.